
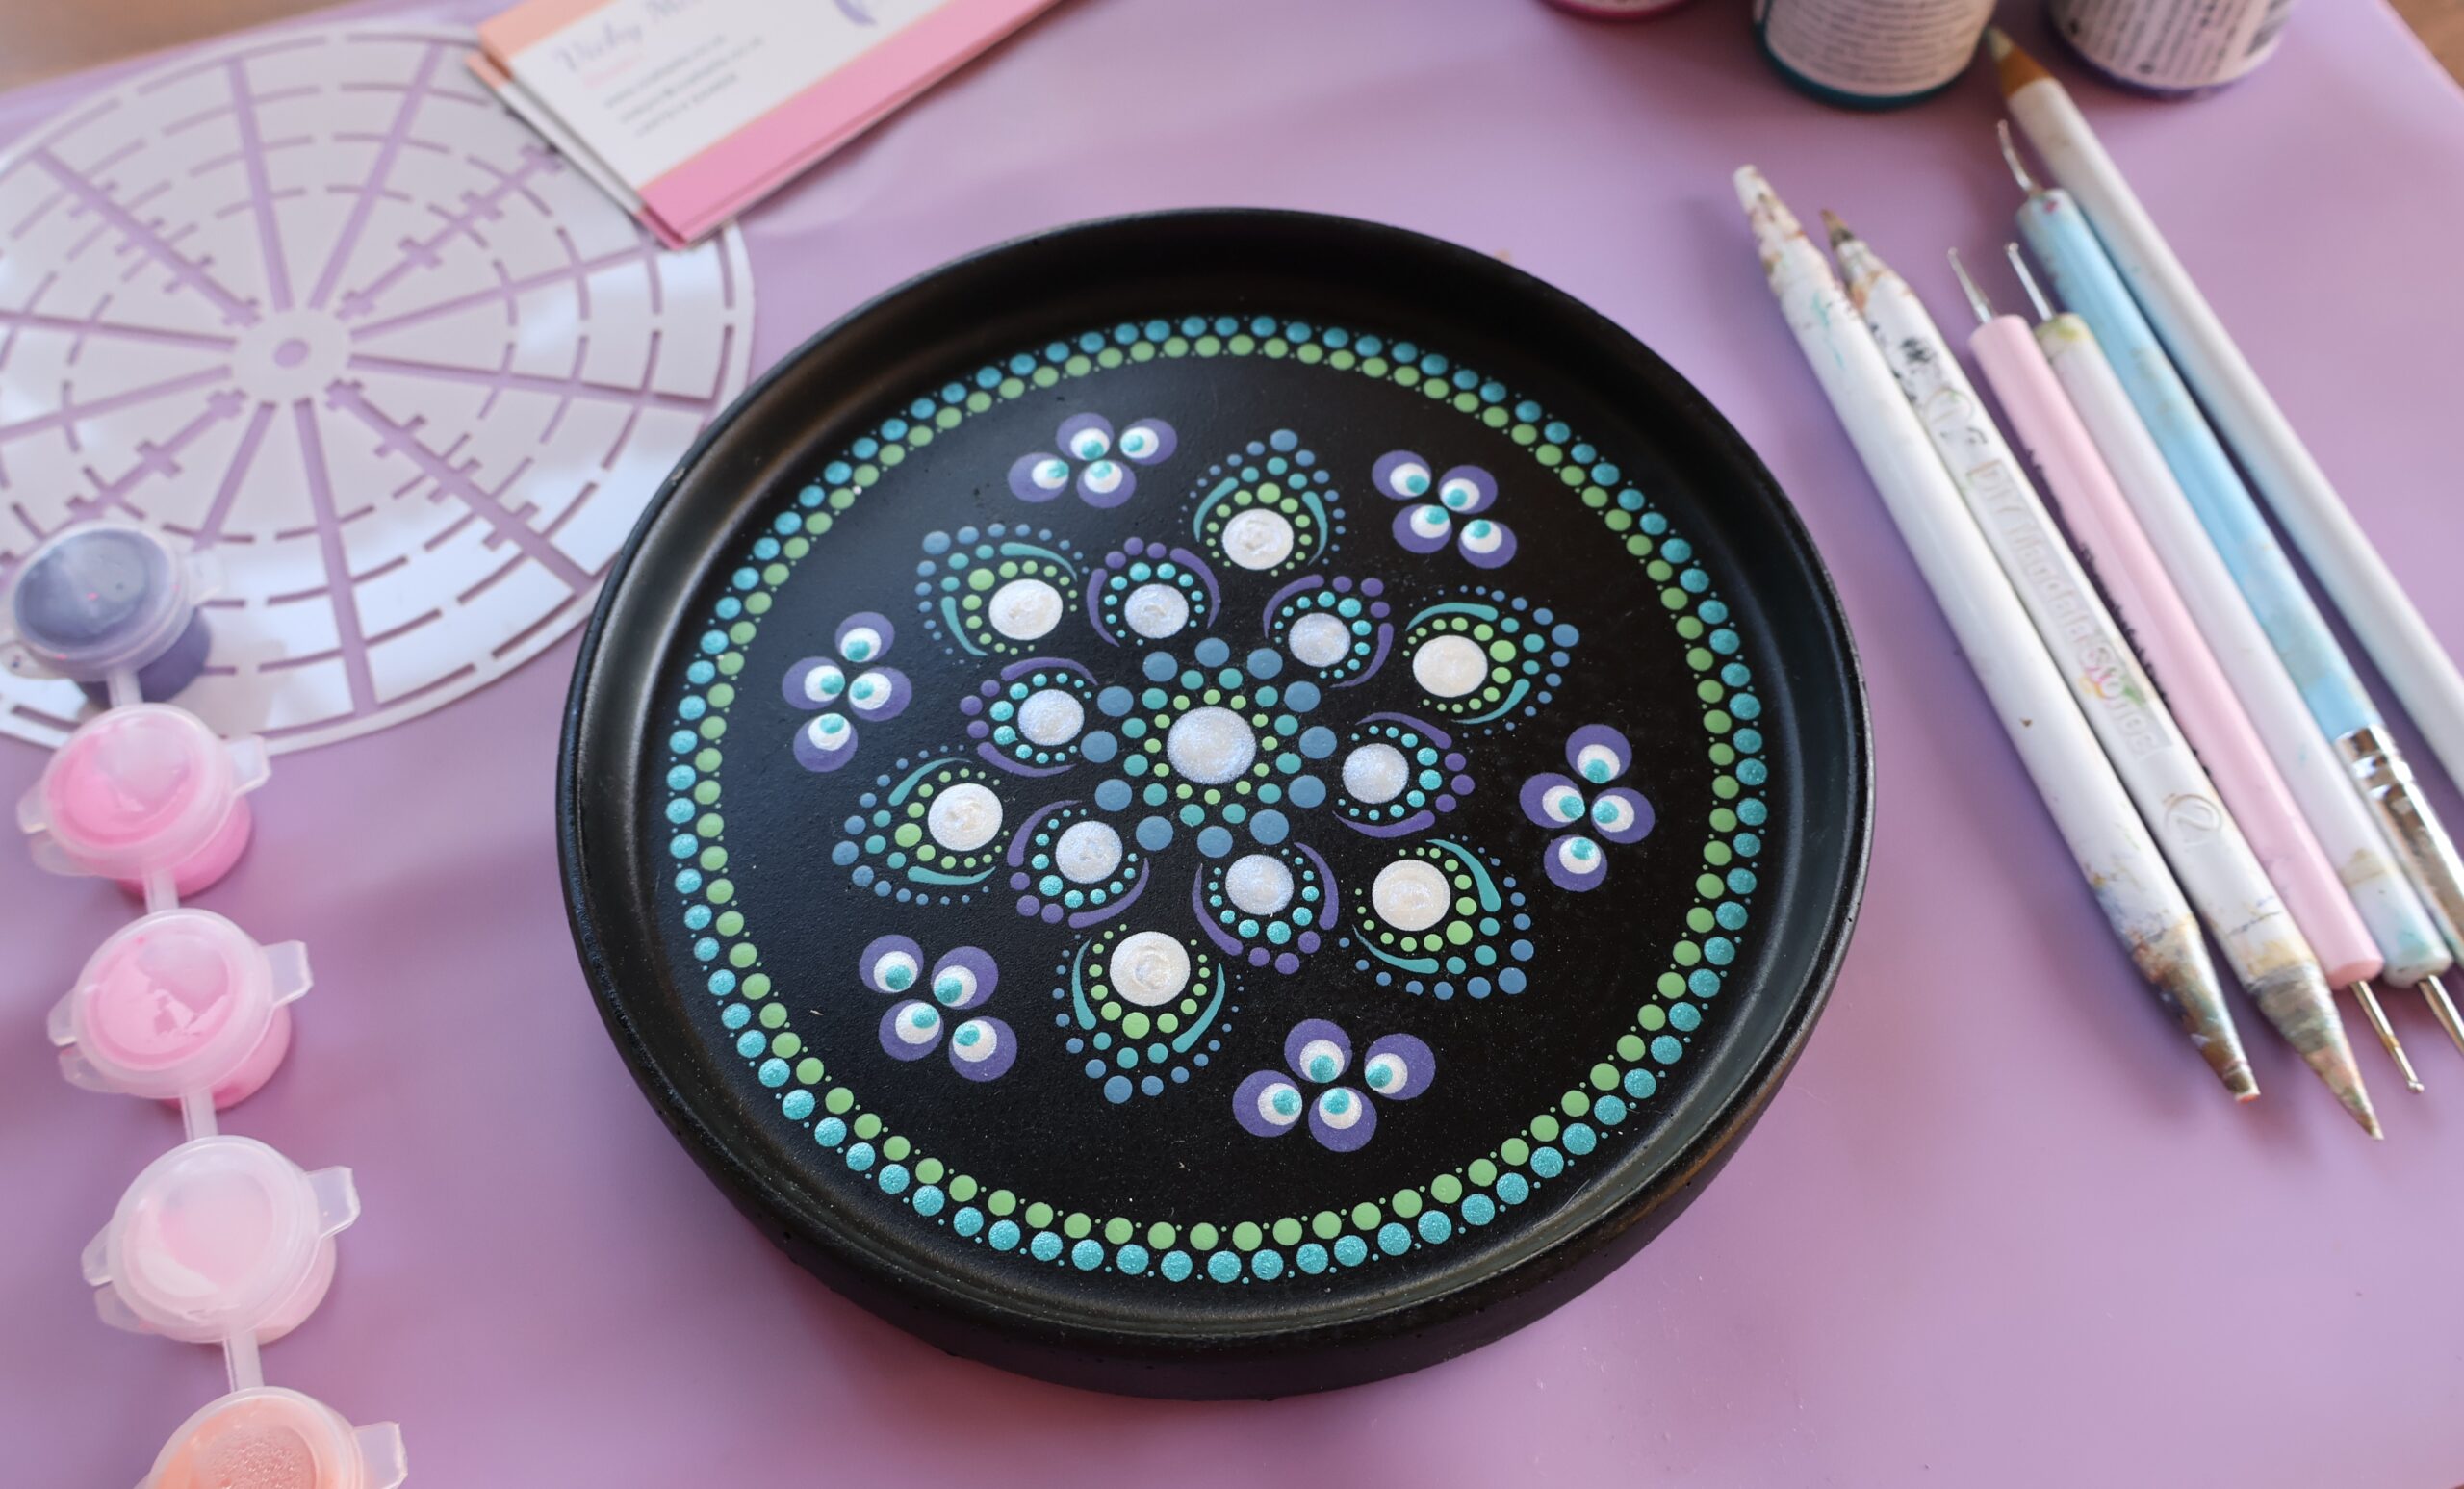
I am very excited to share this small circular dot art tray with you all, as it is the item that we will paint in my first workshop!
Dot art is a fabulous method for making so many every day items unique, and is a calming and meditative form of art that is available for all to try.
Tools and materials
All the tools are materials, go to the Tools and Materials page here:
Recommended materials and tools for dot art – Craft a Life
The tray moulding!
This dish is made using the small 15cm tray from Devon Dotting. I absolutely love all the moulds, and there are so many to choose from of all sorts! I cast these using Herculite 2 (I am planning another blog video on the actual moulding soon also, so watch this space!).
Once moulded, they can be taken out of the mould after 24 hours, though wait for it to fully dry for a week before painting. A week is about average and it does depend on the room temperature – winter may take 10 days, but a warm windowsill in the summer will be less. Don’t rush it though as it will affect the paint adherence if it’s not fully dry.
The painting!
The basecoat is plain black. I use Deco Art acrylic paint, but you can choose whatever acrylic paint you like. For the basecoat you want 2-3 coats though to ensure it’s a nice even colour. More thin coats, with a light sand in between is ideal. Again, take the time on the prep.; anice smooth even basecoat, which has had a good time to dry also, will make a real difference when you come to draw the guidelines and actually paint! For the workshops, I prepare these in advance, so we start with a black tray.
This is a 6 / 12 petal design, so start by making your guide lines with a template that has 12 sections and a nice sharp chalk pencil.
Then go for the dot art! I have shared the video as a taster in the links below.
The workshop booking links are here also:
- https://www.eventbrite.co.uk/e/dot-mandala-beginners-workshop-small-circular-tray-tickets-1307032943719
- Workshops! – Craft a Life
- https://classbento.co.uk/w/u5gc