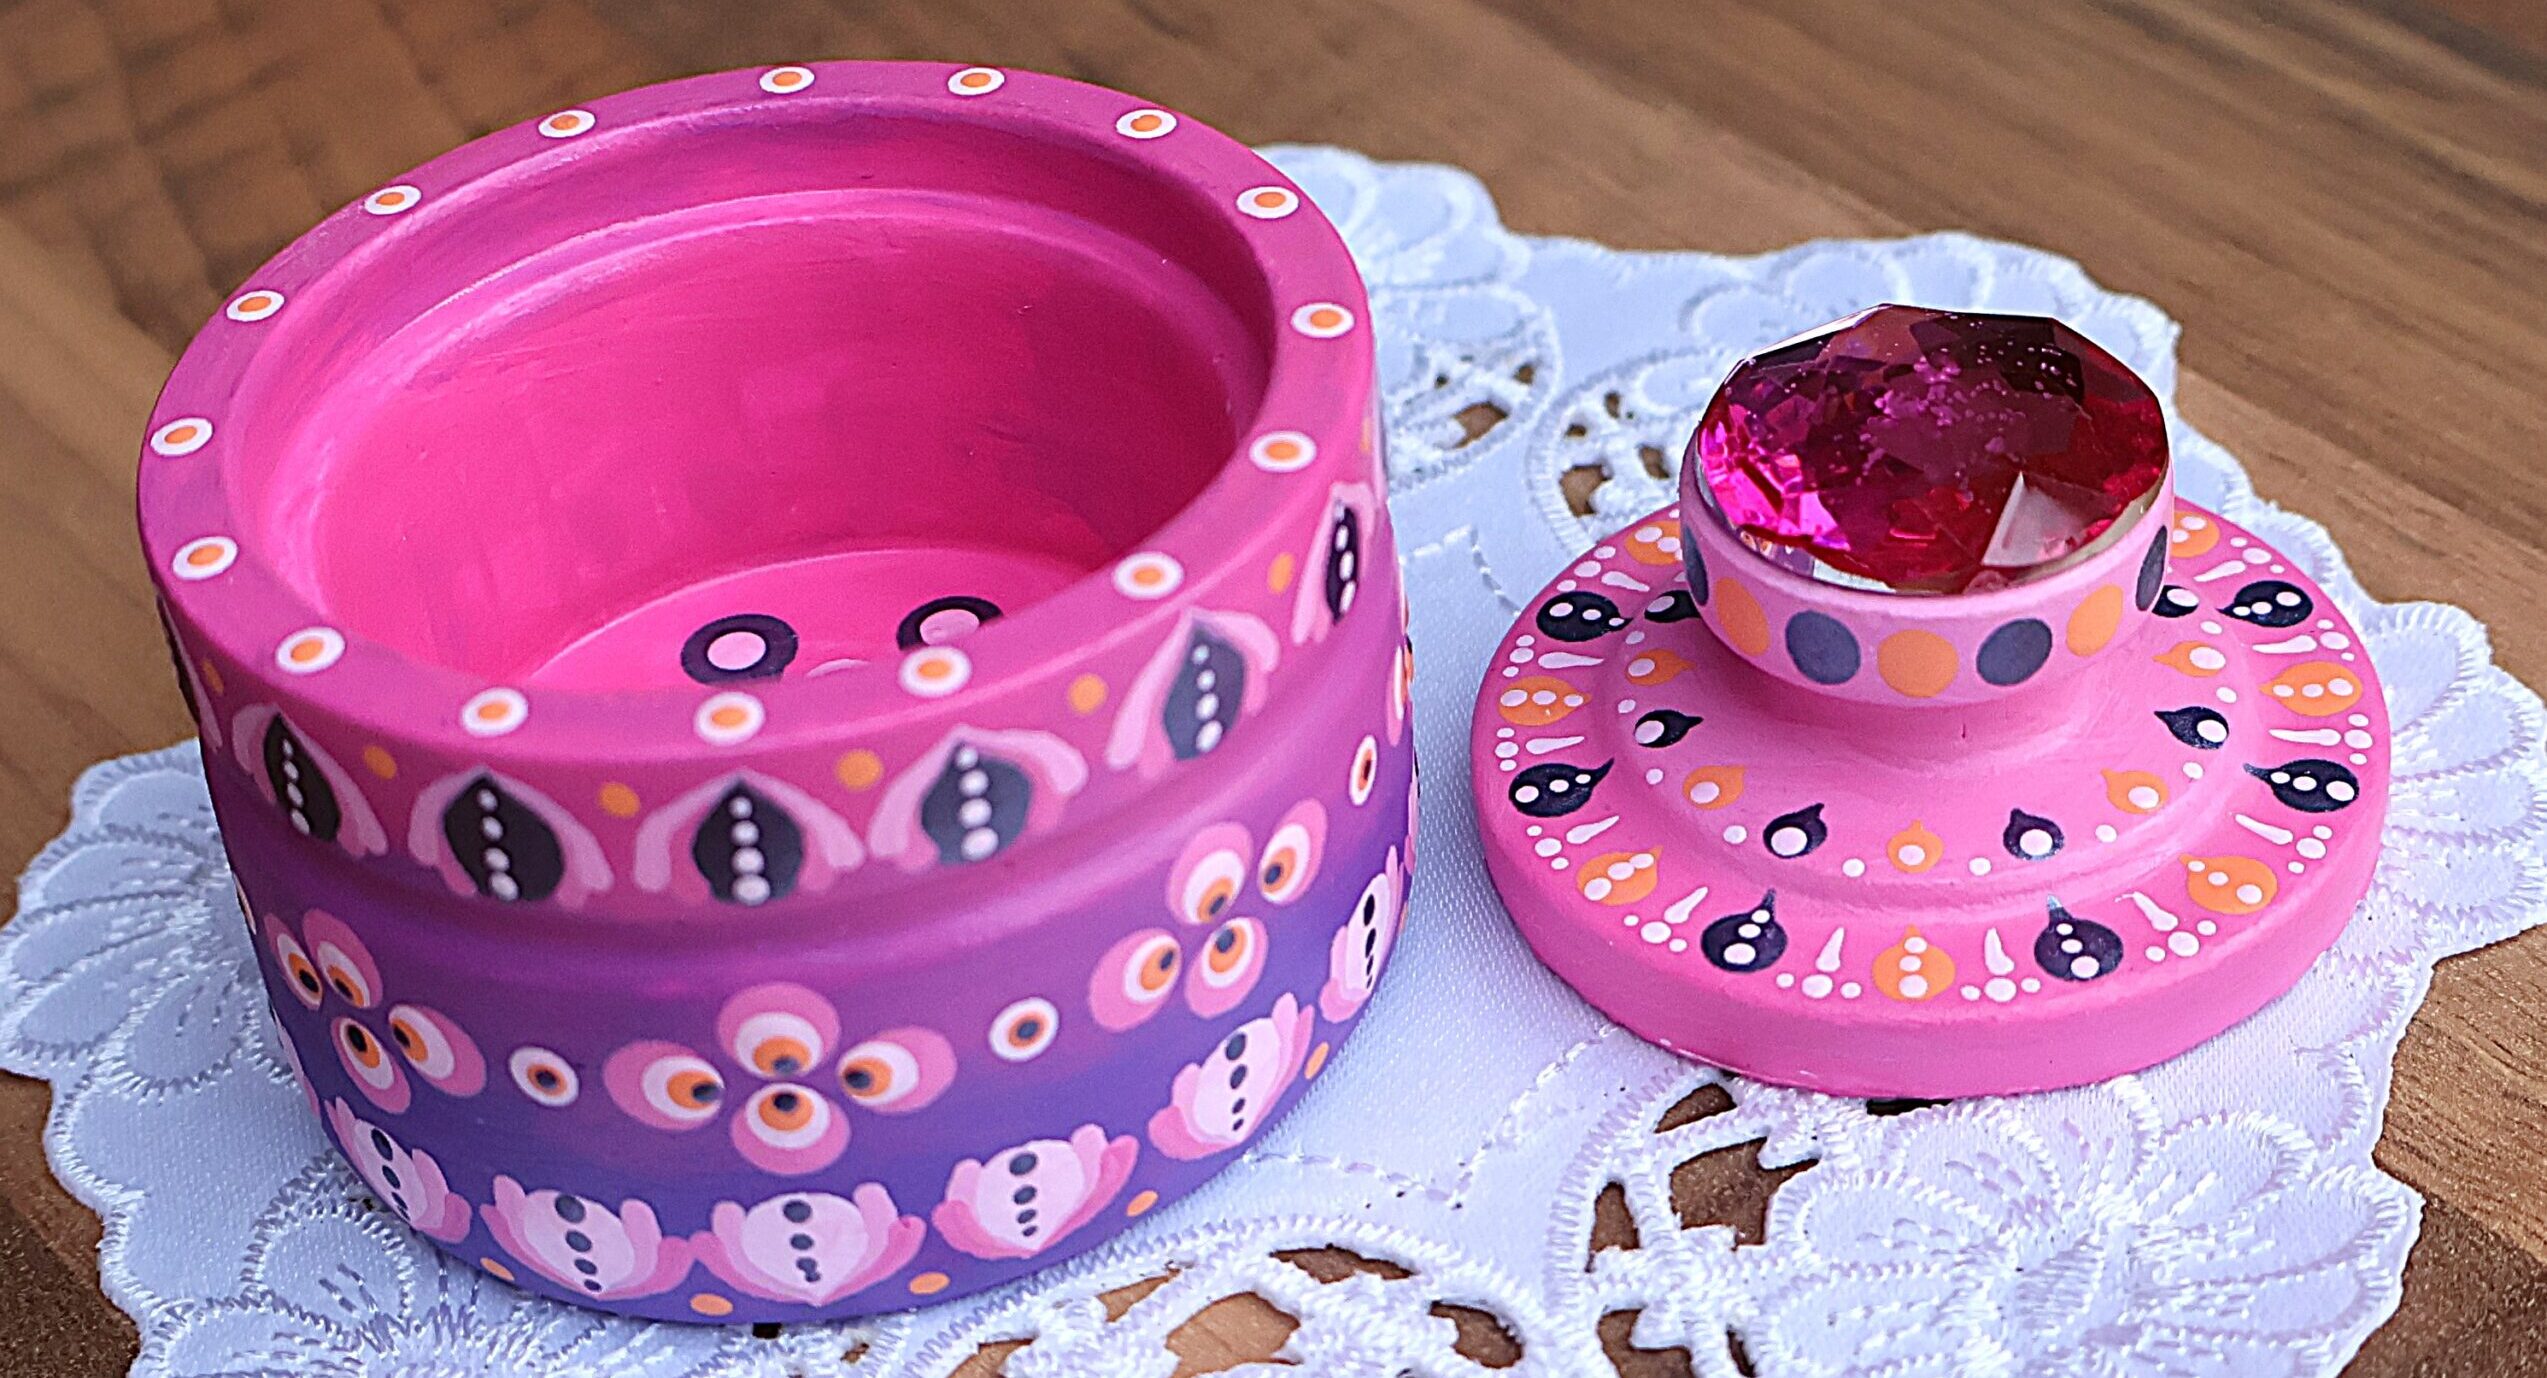
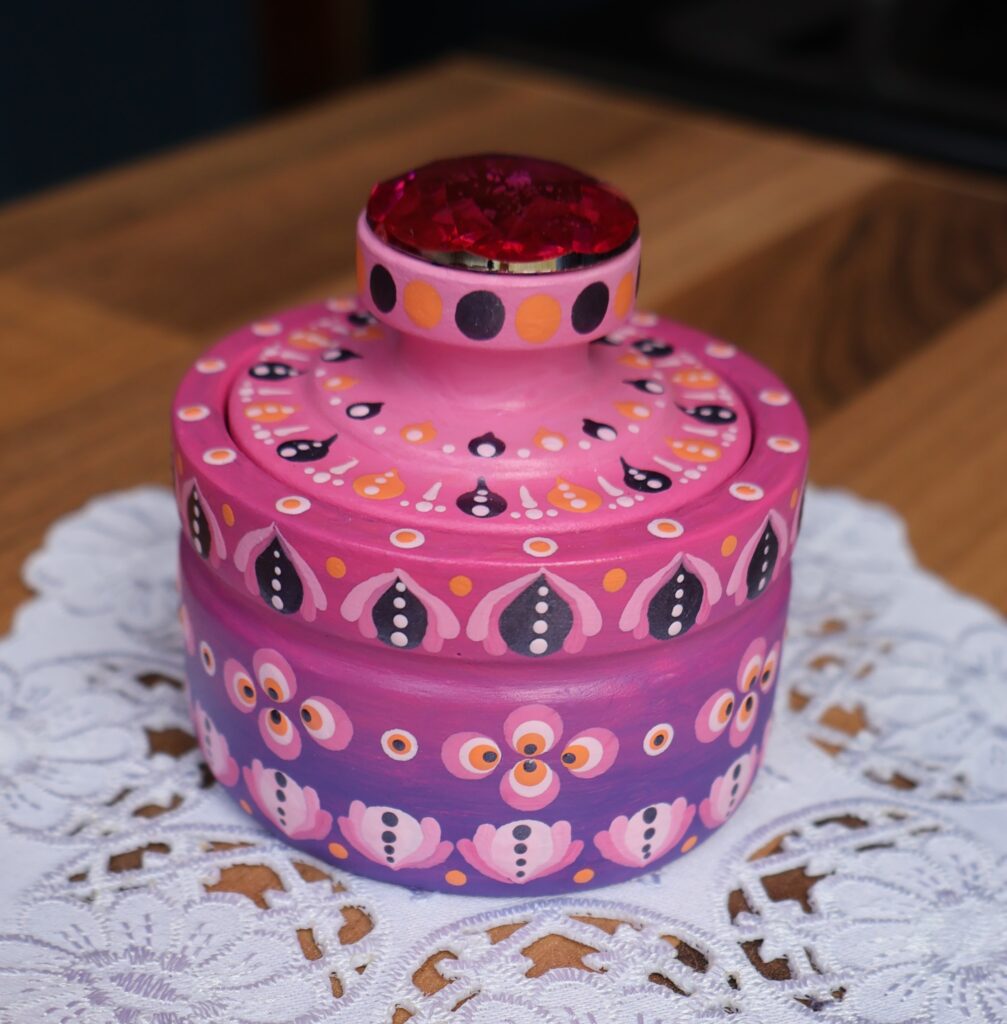
This is another one of the Devon Dotting moulds, a small pot with a lid. I am a fan of all things pink, especially if they are sparkly! The bold colours really work for a small pot – small but with a statement to make!
I used herculite 2 plaster for this 2 part mould. Follow the instructions on the package and it will work well. Just remember to tap well and get the plaster into the edges to avoid bubbles. The plaster sets fairly quickly, so overnight it will be ready to take out of the moulds.
Once you have taken it out though, leave it another 24-48 hours to cure well. Then paint the base coat. I did an ombre base coat for this one. The first coat had a clear line – above pink and below purple. As I built up the layers, I blended them better each time. It doesn’t have to be perfect through if you are covering it with lots of patterns!
Colour schemes
I love the Colour Cubes from Sarah Renae Clark. They really give me a courage I otherwise don’t have with colour! I would never have put the pink, purple and orange together, but with the dark blue and white, they work! This pattern was based on the ring dish that I did first – the pattern and colours were carried over to make a set.
Guidelines
Again, use a white chalk pen to make the guidelines. With these pots I work out the spacing on the underside of the pot. Turn it over and using a protractor or a stencil mark the edges were you need the lines to go up the side of the pot. I used a 8 point – so every 45 deg, with a protractor. If you mark the corners, then turn it over and with a set square, mark the lines going up the pot.
If you can, align the guidelines on the pot with ones on the lid too.
For the lines going around the pot. Hold a pencil still (I rest it on something stable, and various heights (whatever you have around you!). Then I move the pot – it is much easier than keeping the pot still and moving the pencil around!
Finish
Once dried, I used a wet wipe to get rid of the guidelines, sprayed it with an acrylic sealer with 3 thin coats, drying in between. After the top coat had dried, I stuck the pink rhinestone on the top. This is a 1 inch diameter rhinestone from Amazon.
To see the video, please go to:
Instagram:
https://www.instagram.com/reel/DGV-DAMtXyd/?utm_source=ig_web_copy_link&igsh=MzRlODBiNWFlZA==
Facebook:
https://www.facebook.com/share/r/16BN4Q5SHa/
For the materials and tools that I use and recommend please go to:
Recommended materials and tools for dot art